Windows 11 была указана в нашем последнем раунде наименее любимых продуктов, что не должно быть удивительным, учитывая нашу прошлое освещение. Первоначально, Windows 11 представлял собой более визуально согласованное обновление для Windows 10, но со временем его пользовательский опыт ухудшился, даже когда были добавлены новые функции — новая установка операционной системы может быть разочаровывающей, по крайней мере, прежде чем вступить в Дополнительные проблемы с программным обеспечением от вашего компьютера, производителя материнской платы или расширяющегося акцента Microsoft на генеративной технологии искусственного интеллекта.
Купил акции по совету друга? А друг уже продал. Здесь мы учимся думать своей головой и читать отчётность, а не слушать советы.
Прочитать отчет 10-KМы продолжаем выступать за то, чтобы Microsoft выпустила удобную для потребителя версию Windows, которая отражает его бизнес-выпуск, с минимальными предварительно установленными приложениями и уменьшенными рекламными акциями для дополнительных предложений Microsoft. Однако, поскольку многие из нас застряли, используя ориентированные на потребителя версии Windows (Home и Pro), которые ведут себя одинаково, несмотря на их цену и различия в маркировке, мы пересматриваем наш руководство по выполнению «чистой установки» для размещения Windows 11 24H2 и любые недавние модификации, внесенные Microsoft в течение прошлого года.
Еще раз, позвольте мне уточнить, что это не учебник для создания минимальной, устойчивой к обновлению версии Windows без телеметрии. Вместо этого мы сосредоточимся на компонентах, которые Microsoft одобряет отключение и удаление. Доступны неофициальные методы, которые выходят за рамки этих шагов, такие как проект NTDEV Tiny11, но имейте в виду, что устранение встроенных функций Windows может привести к неожиданным проблемам с совместимостью и безопасностью. Например, такие проекты, как Tiny11, столкнулись с проблемами при обработке фундаментальных задач, таких как установка обновлений безопасности.
Начиная с настройки: избегание входа в учетную запись Microsoft
В более простых терминах при установке Windows 11 теперь требуется вход учетной записи Microsoft, в отличие от более ранних версий Windows, где вы можете использовать опцию ограниченной учетной записи. Это правило относится как к домашним, так и к профессиональным изданиям Windows 11 с версии 22H2.
Вот один из способов, которым я мог бы перефразировать заданный текст для лучшей читаемости:
Я могу вспомнить две основные причины, по которым кто -то может не входить в систему с учетной записью Microsoft. Первая причина заключается в том, что они не заинтересованы в использовании учетной записи Microsoft и предпочитают держать свою цифровую жизнь отдельной. Если вы решите войти в систему, Windows, скорее всего, представит вам более частые предложения для Microsoft 365, OneDrive и Game Pass. Это связано с тем, что эти услуги могут быть легко добавлены в существующую учетную запись во время настройки, и если вы входите в систему, процесс настройки может побудить вас приобрести подписку на каждую услугу.
В моем случае, у меня есть учетная запись Microsoft, в основном потому, что она предоставляет полезные функции, такие как автоматическое шифрование моего локального диска (тот факт, что клавиши шифрования связаны с моей учетной записью, спасали меня несколько раз) и синхронизация информации о браузере и некоторых предпочтения. Тем не менее, вы можете не захотеть входить во время настройки по таким причинам, как избежать дополнительных акций или предпочтение, чтобы ваша пользовательская папка была расположена по адресу «C: users Andrew» вместо «C: users .
Независимо от того, почему вы можете предпочесть это, если вы не хотите проходить процесс входа во время настройки, для вас доступно несколько альтернативных способов.
Используйте командную строку
Во время установки Windows 11, после выбора языка и макета клавиатуры, но перед подключением к сети нажмите Shift + F10 (на некоторых клавиатурах вам может потребоваться сначала нажать клавишу FN, прежде чем нажать F10). Введите « oobe oukpassnro », нажмите Enter, а затем дождитесь перезапуска вашего компьютера.
Если есть проблема с вашим подключением к Интернету, перейдите на экран настройки сети и выберите «У меня нет интернета». Сделав это, вы восстановите возможность использовать «ограниченную настройку» или вариант локальной учетной записи, аналогично тому, как она была доступна в более ранних версиях Windows 10 и 11.
Для Windows 11 Pro
Для пользователей Windows 11 Pro есть обходной путь без командной строки, которым вы можете воспользоваться.
Продолжайте регулярный процесс настройки Windows 11, который включает в себя подключение к сети и предоставление разрешения для поиска обновлений. В какой -то момент вы столкнетесь с вопросом с вопросом, настраиваете ли вы свой компьютер для личного использования или для целей «бизнеса или образования».
Выберите вариант «Работа или школа», за которым следует «Параметры входа». После этого вам будет предложено, если вы хотите подключить ПК к домену. Притворяйтесь, что это сделаете, и вы инициируете стандартный процесс создания «ограниченной» локальной учетной записи.
Одна потенциальная проблема заключается в том, что когда вы впервые начинаете использовать свою установку свежих окон, вам может потребоваться ввести ее в заблуждение. Однако, если вы пользуетесь возможностями искусственного интеллекта, скорее всего, ваш компьютер также будет нечестно с вами. Это просто ситуация дала и взять.
Использование инструмента Rufus

Rufus-это уважаемое приложение с открытым исходным кодом, используемое для создания загрузочных USB-дисков, совместимых с системами Windows и Linux. Если вы часто выполняете установки Windows 11 и предпочитаете обходить учетные записи Microsoft, Rufus позволяет вам настроить установку носителя, чтобы последовательно появлялись параметры «ограниченная настройка», независимо от того, с которым вы работаете.
1st step: Get hold of Rufus and a brand new Windows 11 ISO file from Microsoft. Additionally, you’ll need an external USB drive that is at least 8GB in size; opt for one that is 16GB or larger and supports USB 3.0 speed for quicker performance and additional space for drivers, software installers, and other setup essentials. A versatile choice like this SanDisk drive, featuring a USB-C connector on one side and a USB-A connector on the other, would be ideal since it works with various types of computers.
Use Rufus software, select your USB drive along with the Windows ISO, then press the Start button to transfer all Windows files onto the drive. Once you initiate the process, you’ll be prompted to decide if you want to bypass some system requirements such as disabling checks for system requirements, removing the Microsoft account requirement, or turning off data collection settings that Windows typically asks during initial setup. You can choose whatever suits your preference; I often turn off the sign-in requirement, but disabling Secure Boot and TPM checks won’t affect these features once Windows is installed and functioning properly.
The rest of Windows 11 setup
In this setting, I mainly refuse all Microsoft 365 and Game Pass proposals, and instead, I opt out of all privacy settings, such as location services, Find My Device feature, and four toggles that collectively transmit usage and browsing data to Microsoft for the purpose of improving your Microsoft experiences. A useful tip: you can quickly toggle these options using the Tab key and spacebar without having to click or scroll.
Among these options, I can envision activating ‘Find My Device’ if you’re concerned about theft or tracking your location. Alternatively, if you desire Windows and apps to access your location, this option could be useful. Regarding additional telemetry or browsing data, I typically don’t share anything beyond the essentials, except on devices I register for the Windows Insider Preview program, where Microsoft requires more detailed usage data to help test its beta software. To modify these settings after setup, simply navigate to the Settings app under Privacy & Security.
Cleaning up Windows 11
After wrapping up these tasks, I’ll restart, and voila! I’ll find myself back at my trusty Windows desktop. First things first — let’s get any necessary drivers installed, followed by updating Windows to ensure a smooth and secure experience.
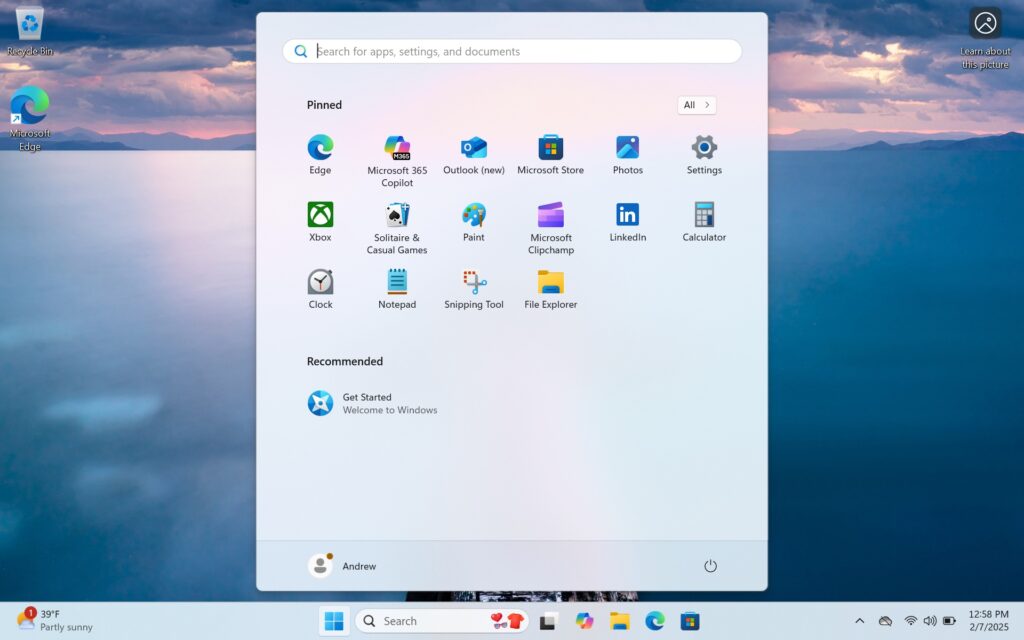
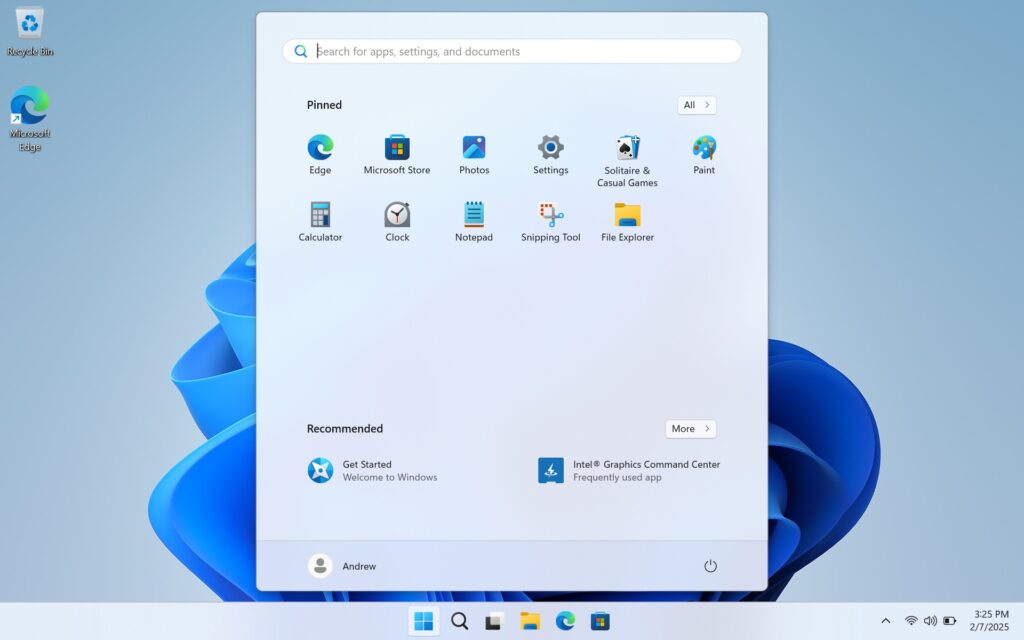
When you initially access the Internet using Windows, there’s a chance that some unnecessary third-party applications like Spotify or Grammarly might automatically download and create shortcuts on your system. This has been a common occurrence across multiple Windows 11 installations I’ve performed over the years, but it didn’t take place in the two PCs I configured to test the settings for this article.
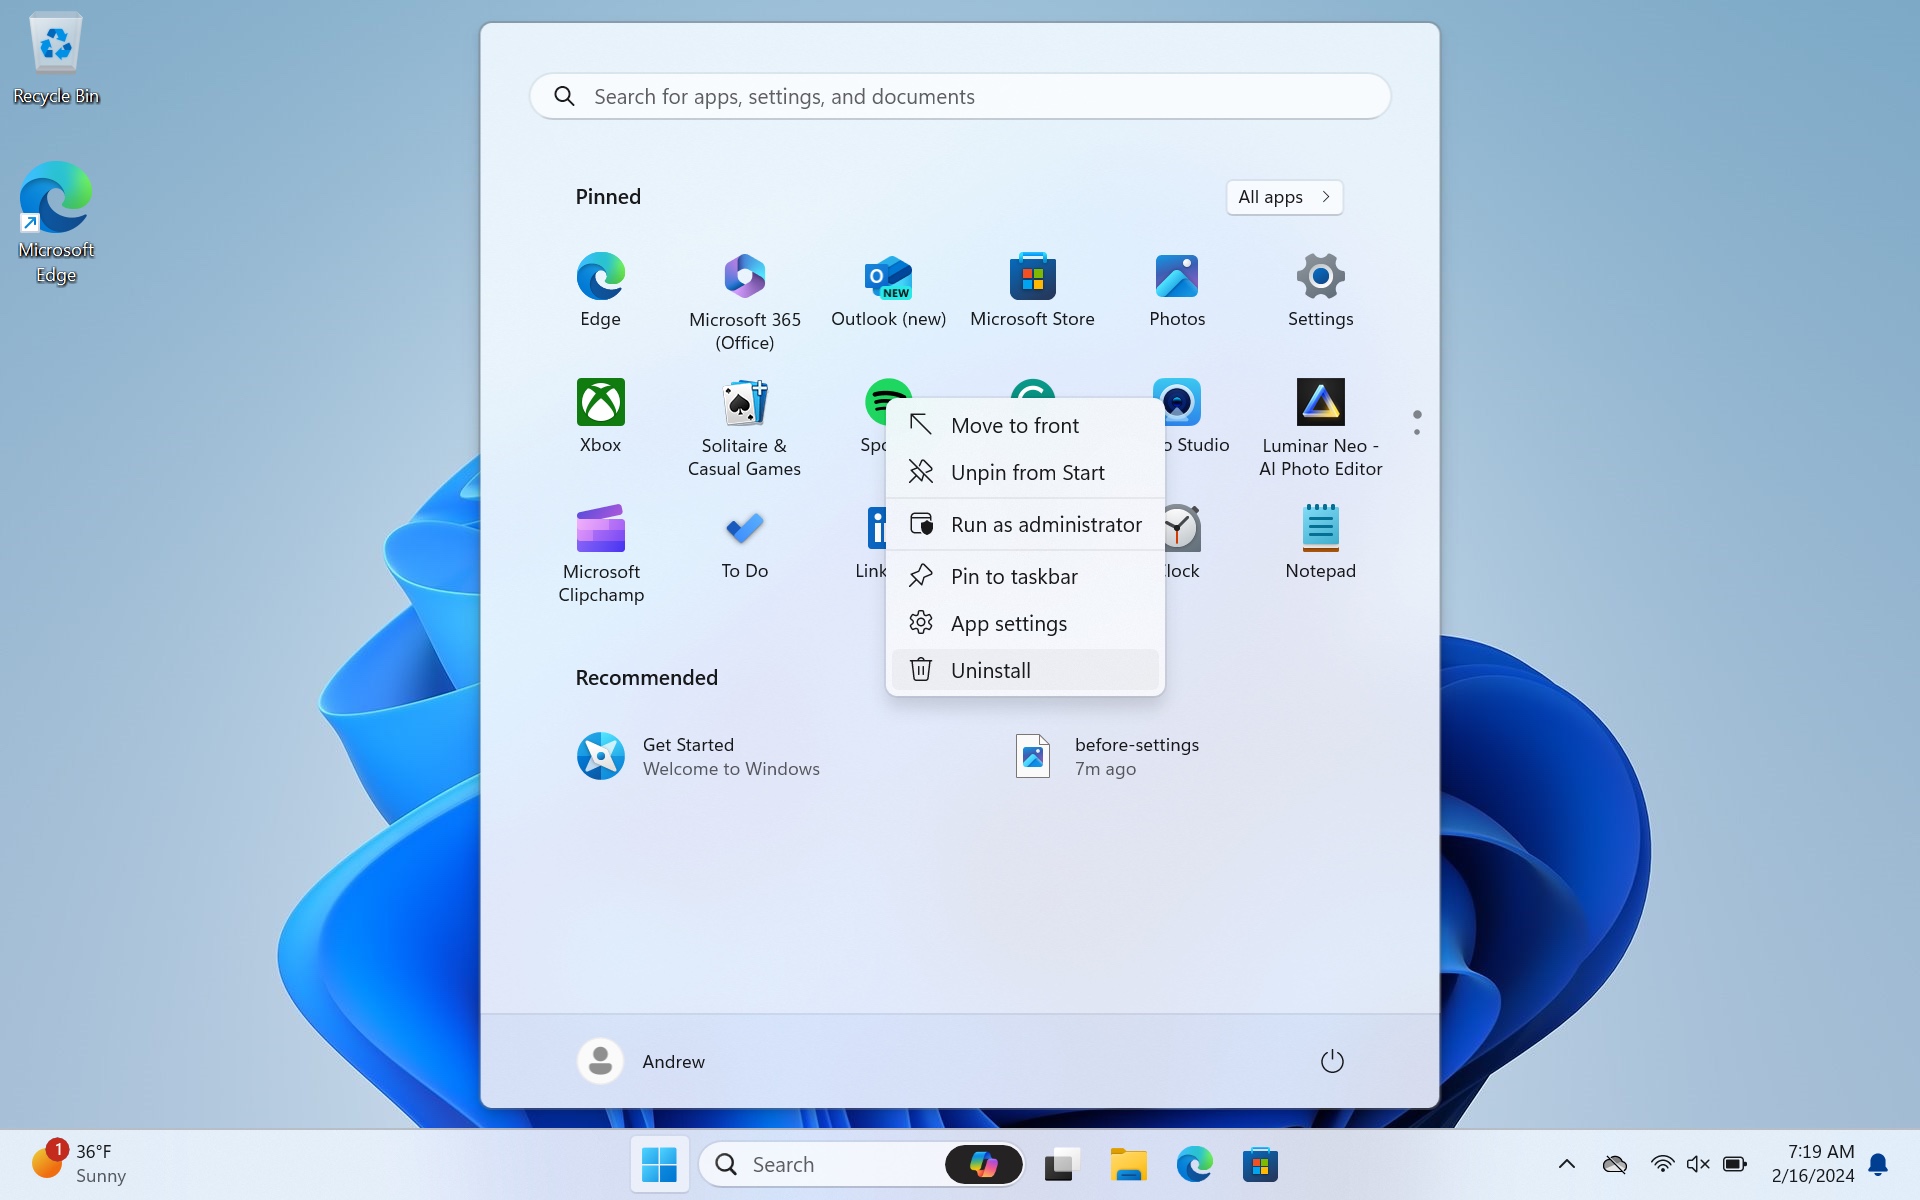
In simpler terms, locate the Start menu on your screen, then right-click on the applications you don’t need. Instead of deleting them completely, choose the option to ‘Hide’ or ‘Remove from start menu’. This way, these apps won’t appear when you open the Start menu anymore. Keep in mind that some third-party apps are just placeholders (stubs) and will only install on your computer if you attempt to use them. So, by removing them from the Start menu, you effectively eliminate them entirely.
In a brand-new installation of Windows, many pre-installed apps and services can justify their presence due to being proprietary software. However, their usefulness is often dependent on individual users: for instance, Xbox, the revamped Outlook app, Clipchamp, LinkedIn are notable among these, along with the free-to-play Solitaire suite that took over from the basic built-in version during the Windows 8 period, which is ad-supported.
Instead of explaining what I delete, let me describe all the apps you can choose to remove from the Apps section within Settings (also quickly accessible by right-clicking on the Start button in the taskbar). You’re free to decide which ones to keep; typically, I leave the built-in Windows applications such as Sound Recorder and Calculator while uninstalling those I seldom use, like To Do or Clipchamp. This list is up-to-date for a brand new, fully updated installation of Windows 11 version 24H2 in the US, excluding any apps tailored to your hardware, such as audio and GPU settings apps.
- Calculator
- Camera
- Copilot
- Family
- Feedback Hub
- Mail and Calendar
- Maps
- Media Player
- Microsoft 365 Copilot: Without a Microsoft 365 subscription, this is just a wrapper/redirect to the free online versions of the Office apps, now with additional Copilot branding
- Microsoft Clipchamp
- Microsoft OneDrive: Removing this, if you don’t use it, will also get rid of notifications about OneDrive and turning on Windows Backup
- Microsoft Teams
- Microsoft To Do
- News
- Notepad
- Outlook (new)
- Paint
- Photos
- Power Automate
- Quick Assist
- Remote Desktop Connection
- Snipping Tool
- Solitaire & Casual Games
- Sound Recorder
- Sticky Notes
- Terminal
- Weather
- Web Media Extensions
- Web Search from Microsoft Bing
- Windows Clock
- Xbox
- Xbox Live
In the latest update of Windows 11, version 23H2, Microsoft shifted most of the non-removable apps to a System Components section, allowing configuration but not removal. Apps like Phone Link, Microsoft Store, Dev Home, and Game Bar have been relocated there. Interestingly, Edge and its related updater and WebView components can’t be removed, yet they aren’t categorized as «system components» for an unexplained reason.
If you have a more recent Windows computer equipped with a Copilot key and decide to uninstall Copilot, follow these steps: Go to Settings > Personalization > Text input to reassign the key. However, its functionality is currently restricted — you can change it to perform the Search action or launch the Microsoft 365 application. By default, Windows doesn’t allow you to set it up to open any other program of your choice.
Start, Search, Taskbar, and lock screen decluttering
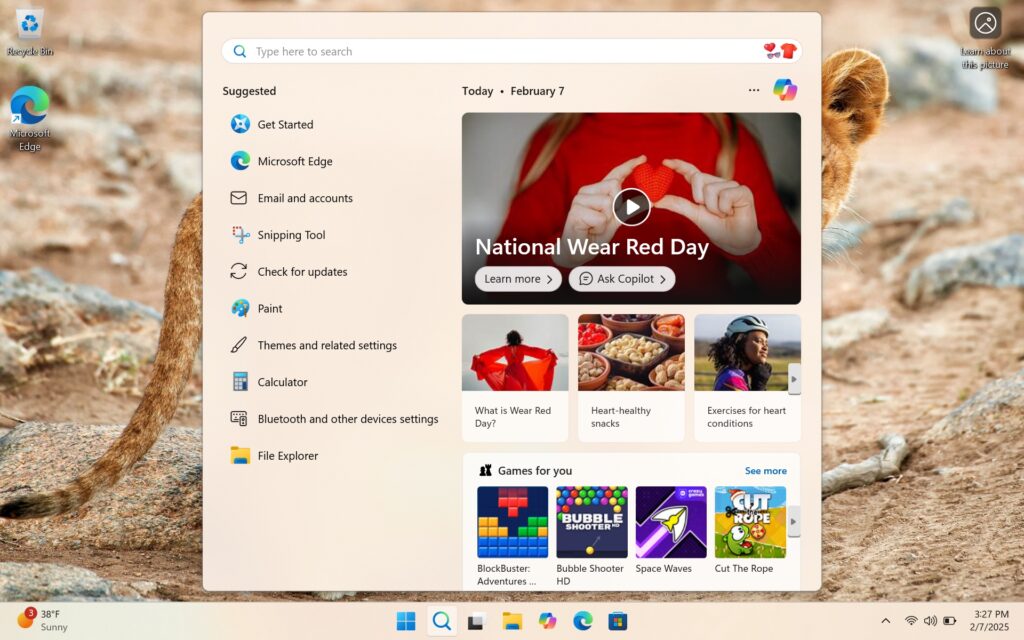
Microsoft has been persistently working to eliminate unnecessary space within the Start menu and taskbar over several years, resulting in numerous options for you to disable.
In a new setup of Windows 11 version 24H2, the default wallpapers are automatically downloaded from the web via Windows Spotlight. While these images are quite appealing, they come with an inconvenient «discover more about this image» icon on your desktop. To disable Spotlight and remove this icon, simply right-click any empty area on your desktop, select ‘Personalize’, and choose one of the predefined Windows themes available.
The following settings should also help you declutter the user interface:
- Right-click the Taskbar and click Taskbar settings. I usually disable the Widgets board; you can leave this if you want to keep the little local weather icon in the lower-left corner of your screen, but this space is also sometimes used to present junky news articles from the Microsoft Start service.
- If you want to keep Widgets enabled but clean it up a bit, open the Widgets menu, click the Settings gear in the top-right corner, scroll to «Show or hide feeds,» and turn some suggested feeds off. This will keep the weather, local sports scores, stocks, and a few other widgets, but it will get rid of the spammy news articles.
- Also in the Taskbar settings, I usually change the Search field to «search icon only» to get rid of the picture in the search field and reduce the amount of space it takes up. Toggle the different settings until you find one you like.
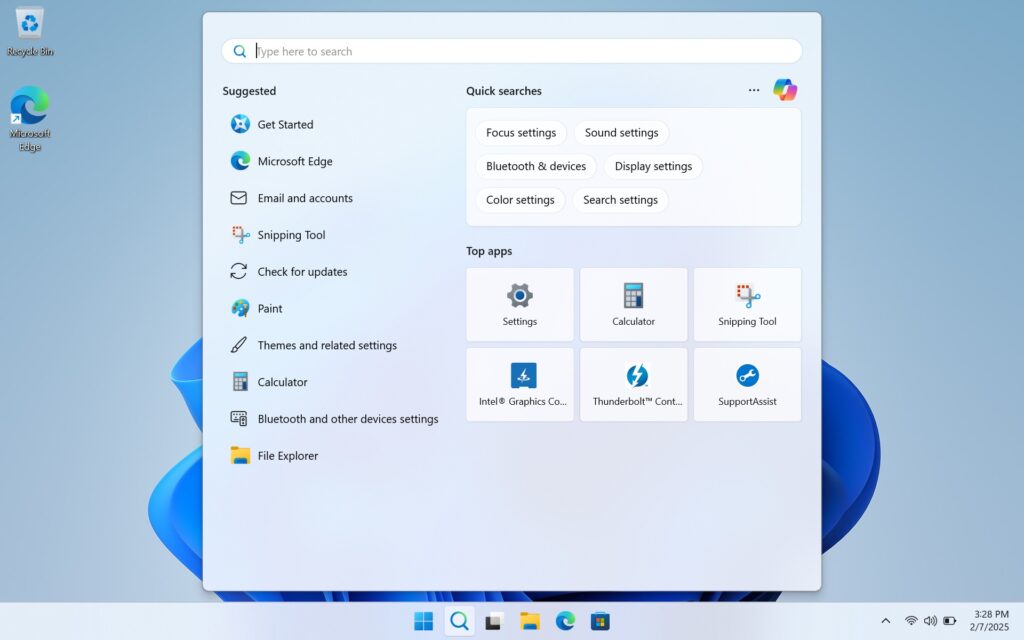
- Open Settings > Privacy & Security, click Search permissions and disable «Show search highlights» under «More settings.» This cleans up the Search menu quite a bit, focusing it on searches you’ve done yourself and locally installed apps.
- Open Settings > Privacy & Security > General and disable «Show me suggested content in the Settings app» and «Show me notifications in the Settings app» to turn off some Microsoft account-related reminders and upsells from the Home page of the Settings app.
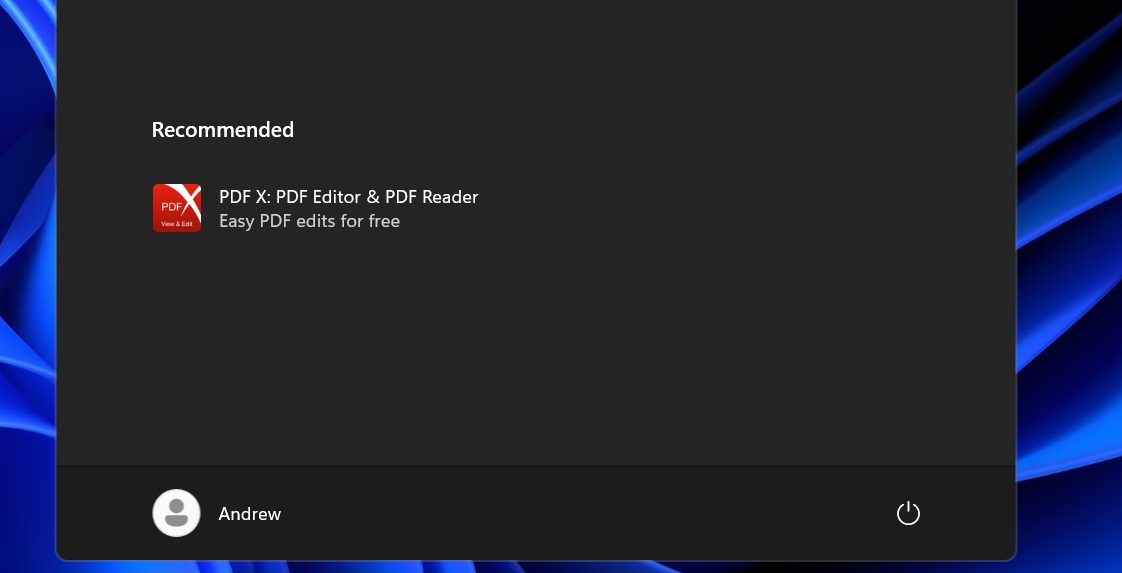
- Open Settings > Personalization > Start. Turn off «Show recommendations for tips, shortcuts, new apps, and more.» This will disable a feature where Microsoft Store apps you haven’t installed can show up in Recommendations along with your other files. You can also decide whether you want to be able to see more pinned apps or more recent/recommended apps and files on the Start menu, depending on what you find more useful.
- On the same page, disable «show account-related notifications» to reduce the number of reminders and upsell notifications you see related to your Microsoft account.
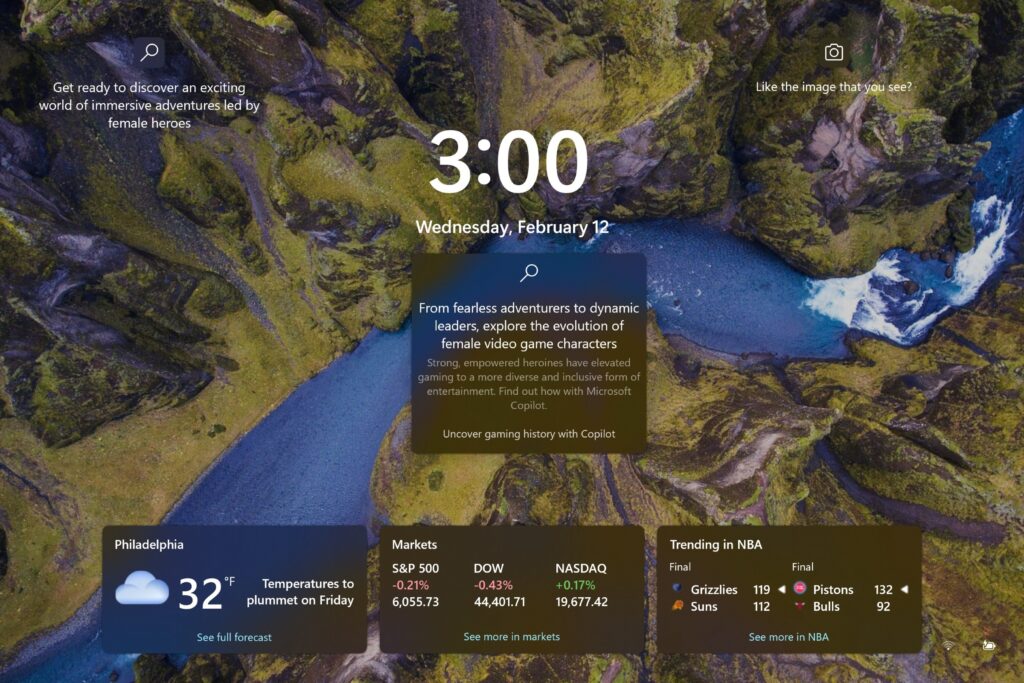
- Open Settings > Personalization > Lock screen. Under «Lock screen status,» select «none» to hide the weather widget and other stocks and news widgets from your lock screen. Under «Personalize your lock screen,» switch from «Windows spotlight» to either Picture or Slideshow to use local images for your lock screen, which will also allow you to uncheck the «get fun facts, tips, tricks, and more» box and hide the other text boxes and clickable elements that Windows automatically adds to the lock screen in Spotlight mode.
Making Windows stop suggesting so many things
The following step is adjusting additional Windows settings to reduce the frequency of bothersome pop-ups suggesting purchases and reminders about finishing system setup. However, it’s essential to note that your preferences matter most; this guidance aims to help you customize Windows to be less distracting and intrusive.
- Settings > Privacy & Security > General. Even if you disabled all the data collection options at Setup, there are still other things enabled here; I turn off all of these toggles.
- Again, under Privacy & Security, open Diagnostics & Feedback, scroll down to Feedback, and set «Feedback frequency» to Never.
- Open Settings > System > Notifications, and turn off the «Suggested» notifications. This may not appear if you’re not signed in with a Microsoft account.
- Still in the notifications settings, scroll all the way down and expand the additional settings section. Uncheck all three boxes here, which should get rid of all the «finish setting up your PC» prompts, among other things.
A note on Recall and Copilot+ PCs
To date, all the topics we’ve discussed are compatible with any PC that can operate Windows 11. However, devices branded as Copilot+, which include those with a Qualcomm Snapdragon X processor or specific Intel Core Ultra or AMD Ryzen AI CPUs, enjoy additional features not found in standard Windows 11 PCs.
In this section, some details might not directly apply to your specific Copilot+ PC model as certain features are still in developmental stages, with the Qualcomm variants getting them first compared to Intel and AMD versions. However, considering the distinctive nature of these devices, it’s beneficial to understand what they offer and which options can be customized according to your needs.
As a researcher, I’ve found that most of the Copilot+ PC features are primarily image-generation capabilities embedded within Paint and Photos applications. Unfortunately, there isn’t an easy on/off switch to disable these additional AI functionalities. While you might find some registry keys to tweak or, for Pro versions of Windows, delve into local policies to deactivate them, it’s uncertain if these settings will persist with Microsoft updates. Thus, it seems simpler to simply coexist peaceably with these features rather than attempt to suppress them entirely.
One notable feature of Copilot+ that may potentially be eliminated entirely, due to initial controversy surrounding it, is the Data-Scraping Recall feature. As of now, this feature is exclusive to Windows Insider previews. To deactivate it once it becomes available on your Copilot+ PC:
1. Navigate to your device’s settings.
2. Look for the Copilot+ section or setting.
3. Locate the Data-Scraping Recall feature and disable it.
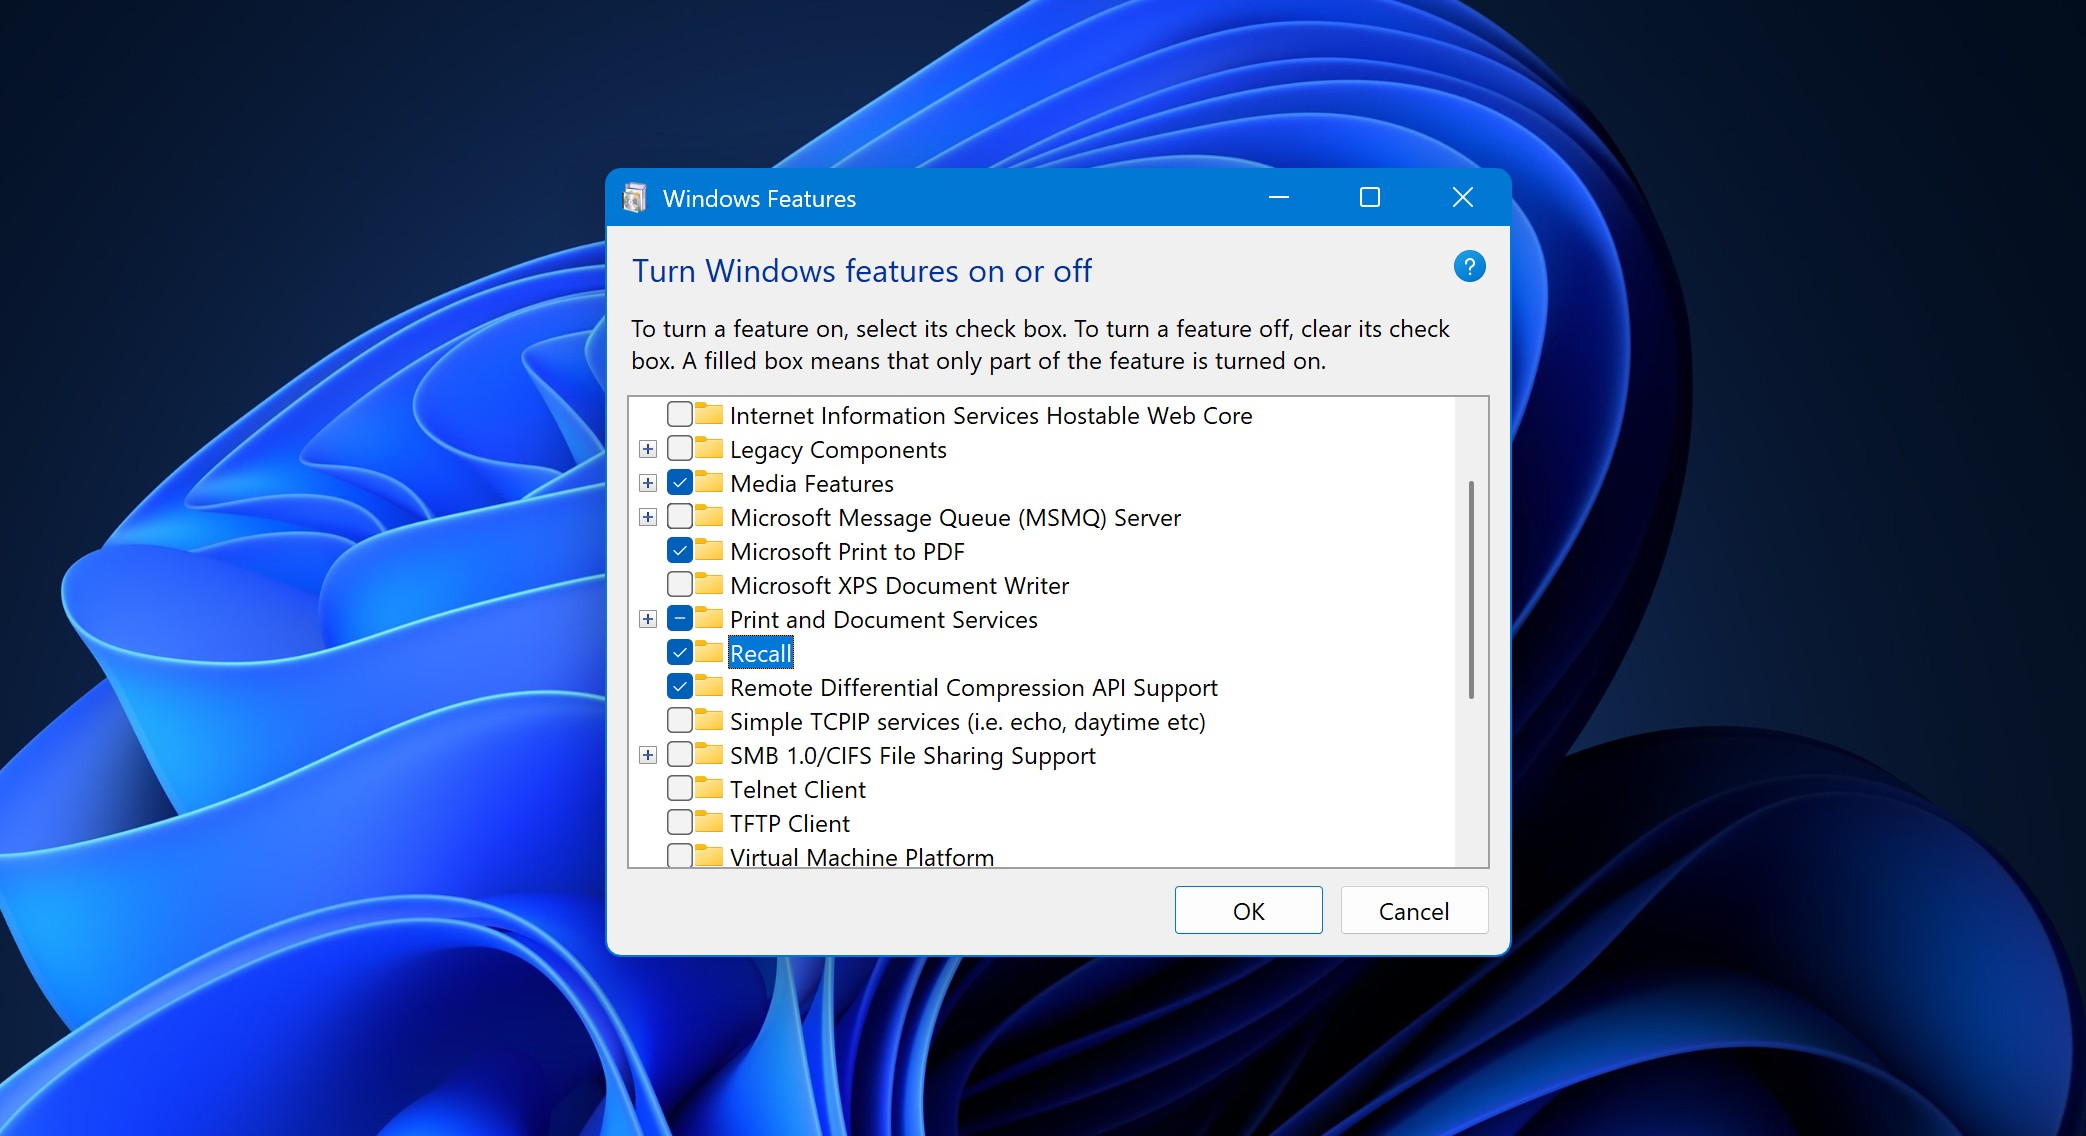
- Open Settings > System > Optional Features, scroll down to the bottom of this screen, and click More Windows features. This will open the old «Turn Windows features on or off» Control Panel applet used to turn on or remove some legacy or power-user-centric components, like old versions of the .NET Framework or Hyper-V. It’s arranged alphabetically
To use the Recall feature in your Copilot+ system, you must sign in with a Microsoft account and opt-in explicitly. As of now, Microsoft is working on making Recall optional entirely to ease concerns. However, if deselecting the box provides you with more comfort, feel free to do so.
Bonus: Cleaning up Microsoft Edge

As an analyst, I find myself gravitating towards Microsoft Edge due to practical considerations rather than emotional attachment. The blend of speed, compatibility, and extension ecosystem that Google services are absent from appeals to me significantly. However, the allure of Edge has diminished somewhat as Microsoft has increasingly integrated its own services.
In an ideal world, Firefox would meet my expectations for a browser, but it struggles with my usual tab-heavy browsing habits, even after numerous attempts to switch. The performance issues coupled with rapid RAM depletion make it less than ideal. Moreover, I’ve had varying experiences with lesser-known Chromium clones like Opera, Vivaldi, and Brave.
For now, Edge seems the best fit for me, despite its push towards Microsoft services. I remain open to exploring other options in the future, but for the time being, Edge serves my needs reasonably well.
In a new installation of Windows Edge, the primary issue lies in its environment where users seldom wish to alter their search engines or disable any of Microsoft’s additional features, usually only doing so unintentionally. For instance, logging in with a Microsoft account conveniently synchronizes your bookmarks, extensions, and numerous personal data types. However, configurations for modifying the search engine or opting out of Microsoft services do not synchronize across systems; instead, you must manually set up these changes every time.
In this text, I’ve adjusted the way the information is presented for easier understanding:
Here are some adjustments I make to Edge settings to maximize its usefulness and screen space while minimizing annoying distractions. These changes are primarily about turning off features that Microsoft has added to the Chromium version of Edge since its public preview six years ago. The following list applies whether you use a Microsoft account or not:
1. Turn off news suggestions on the new tab page.
2. Disable Cortana in search and browsing.
3. Adjust or disable the «Recommended Sites» section on the new tab page.
4. Customize the appearance of tabs, such as their color and size.
5. Modify or turn off the reading view and reader mode.
6. Configure privacy settings according to your preferences.
7. Adjust the appearance and behavior of toolbar buttons and other interface elements.
- I usually right-click and hide the «browser essentials» button, the little heart-shaped one toward the upper-right corner of the Edge window.
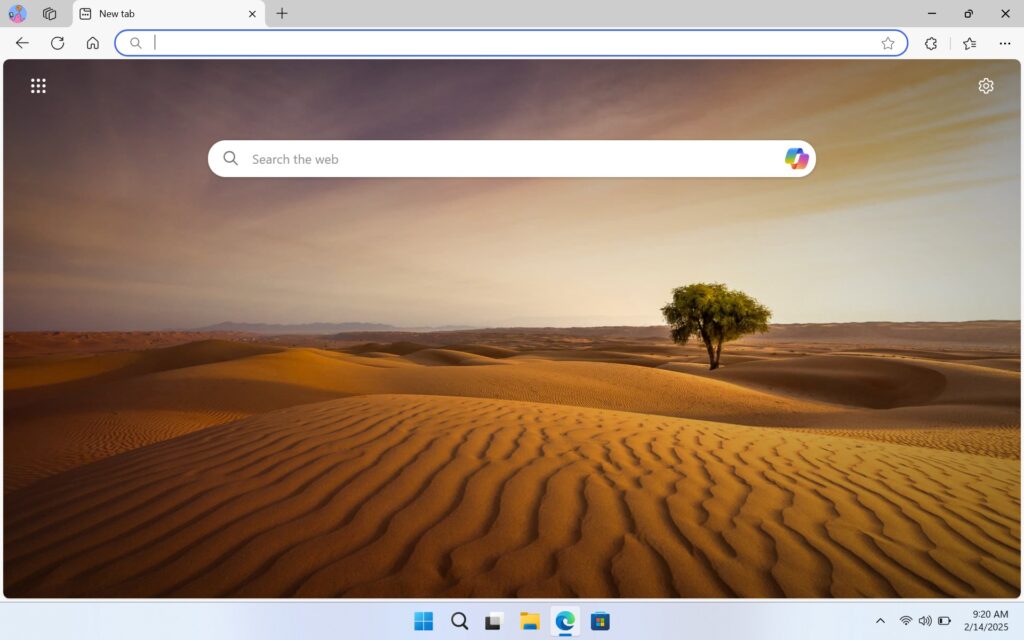
- On the Start page when you first open the browser, hit the Settings gear in the upper-right corner. Turn off «Quick links» (or if you leave them on, turn off «Show sponsored links») and then turn off «show content.» Whether you leave the custom background or the weather widget is up to you.
- Click the «your privacy choices» link at the bottom of the menu and turn off the «share my data with third parties for personalized ads» toggle.
- In the Edge UI, click the ellipsis icon near the upper-right corner of the screen and click Settings.
- Click Profiles in the left Settings sidebar. Click Microsoft Rewards, and then turn it off.
- From here, click Privacy, Search, & Services. I set tracking prevention to «strict,» though if you use some other kind of content blocker, this may be redundant; it can also occasionally prompt «it looks like you’re using an ad-blocker» pop-up from sites even if you aren’t.
- If they’re enabled, disable the toggles under «Optional diagnostic data,» «Search and service improvement,» and «Personalization & advertising.»
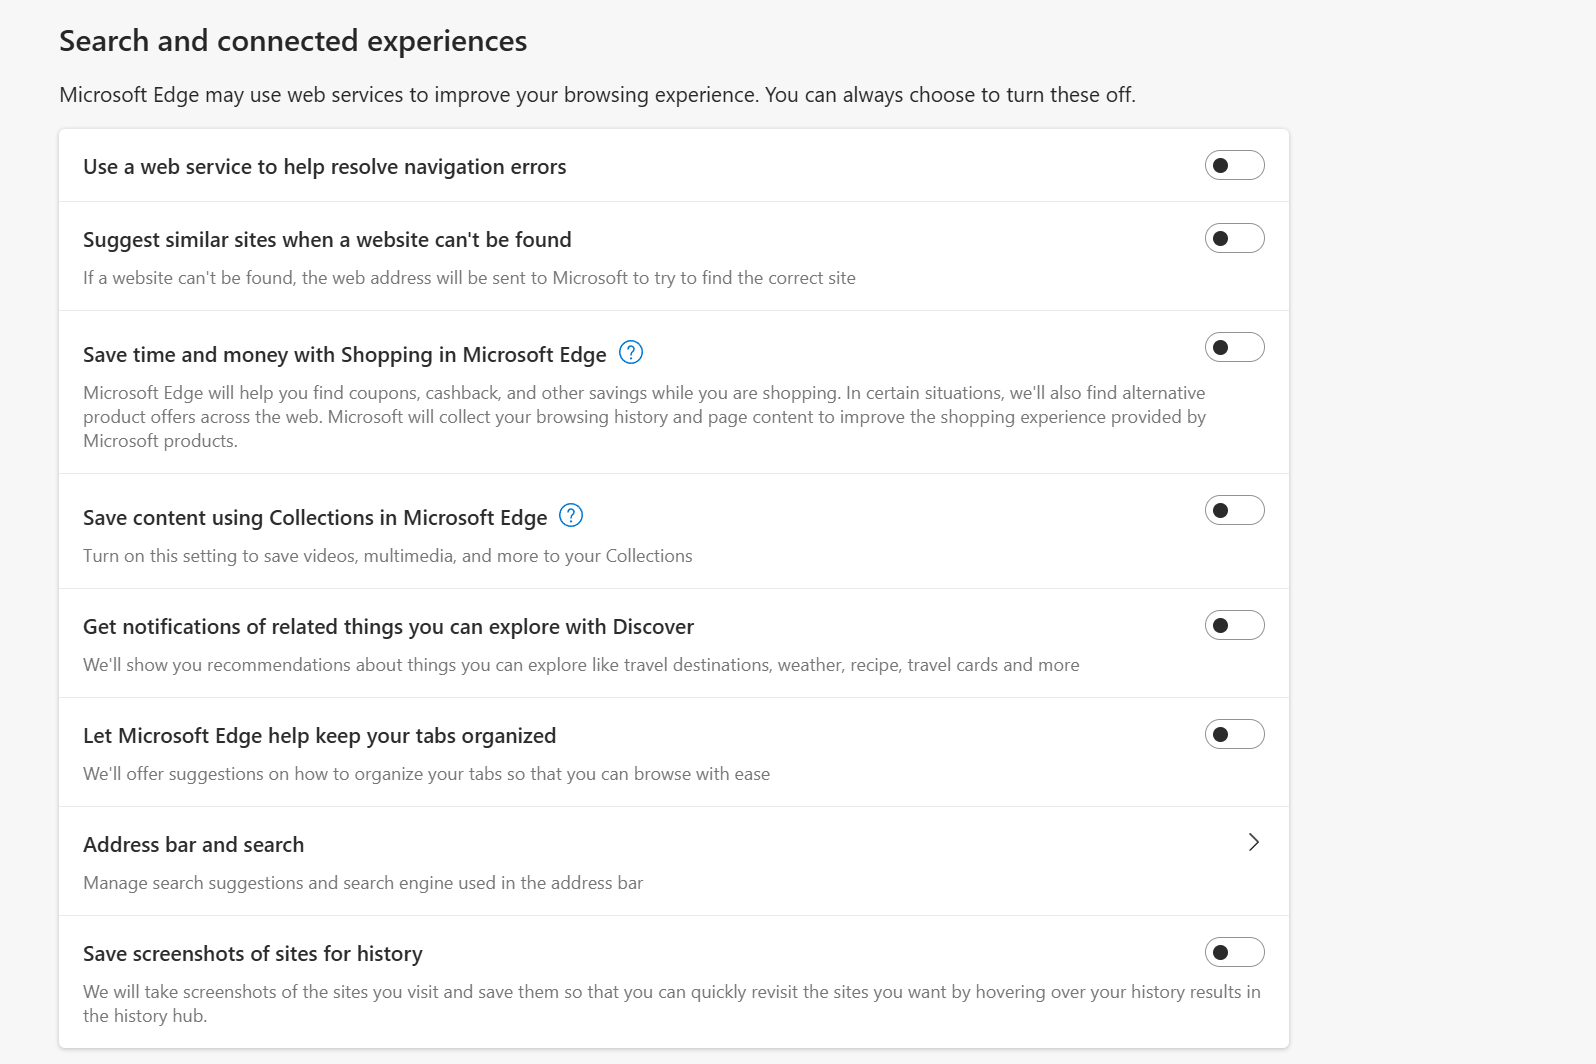
- I disable every toggle under the Services header. These mainly generate annoying pop-ups and suggestions for things you haven’t asked for.
- If you want to switch from Bing, click «Address bar and search» and switch to your preferred engine, whether that’s Google, DuckDuckGo, or something else. Then click «Search suggestions and filters» and disable «Show me search and site suggestions using my typed characters.»
- Click Copilot and sidebar in the left-hand navigation (it may just say «Sidebar» if you’re not logged in). Click Copilot, then turn off «Show Copilot button on the toolbar.» Then click the back arrow and turn off «Show sidebar button.»
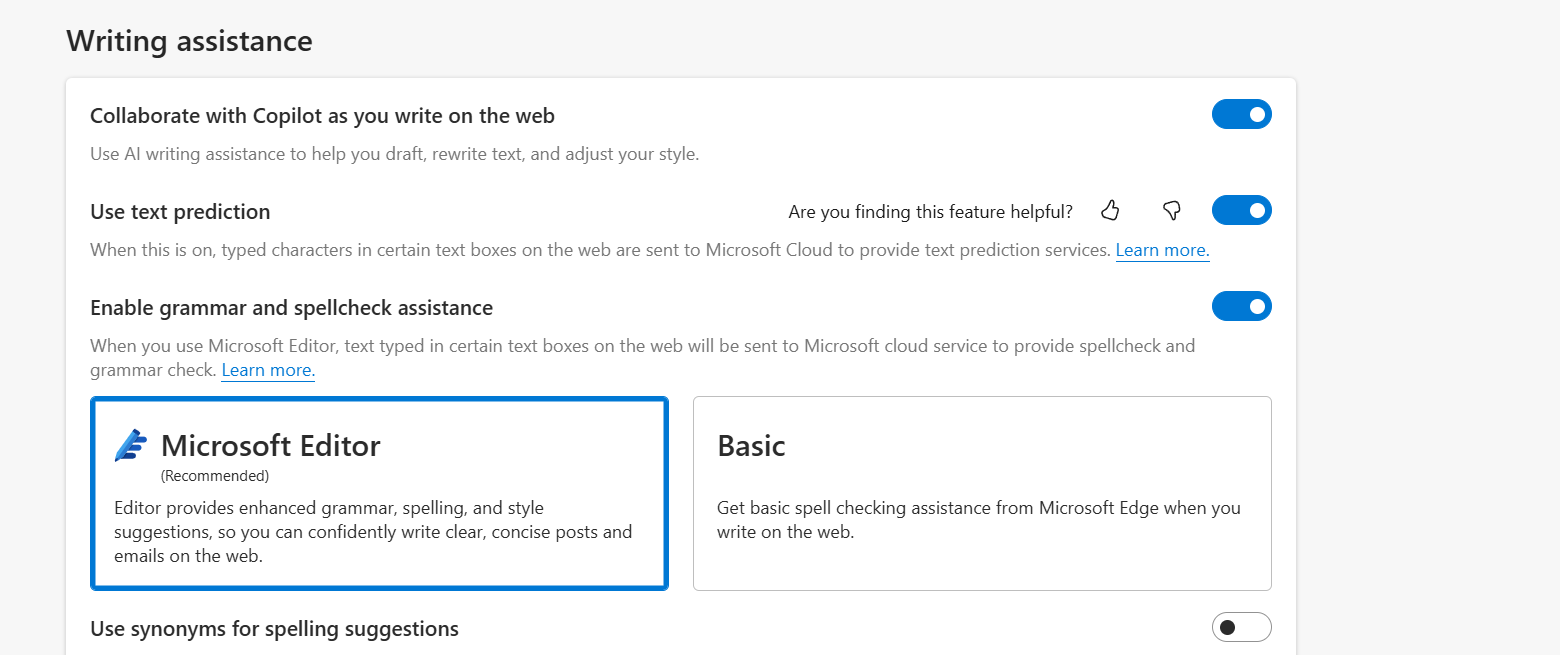
- Click Languages in the left-hand navigation. Disable «collaborate with Copilot as you write on the web.» Turn off «use text prediction» if you want to prevent things you type from being sent to Microsoft, and switch the spellchecker from Microsoft Editor to Basic. (I don’t actually mind Microsoft Editor, but it’s worth remembering if you’re trying to minimize the amount of data Edge sends back to the company.)
Windows-as-a-nuisance
Installing a brand-new copy of either Windows XP or Windows 7 from Microsoft often required reinstalling various applications such as your preferred browser, Office suite, Adobe Reader, Photoshop, and VLC player. This remains true for a fresh installation of Windows 11. However, in light of the current times, many users may find it necessary to customize their OS by disabling certain features to streamline their daily experience with the operating system and minimize annoyances.
If you haven’t already known, Microsoft has marked 2025 as «the year for Windows 11 PC upgrades.» Interestingly, they are also ending security updates for many Windows 10 users in October. So, if you’ve been hesitant about using Windows 11, 2025 may be the time when you’ll likely need to switch to it if your apps, games, or workflows depend on Windows.
The adjustments we’ve suggested might not solve all your issues, but they could provide some relief by making Microsoft less intrusive and giving you more freedom to use your PC as you prefer, with fewer complications. It would be ideal if Microsoft adopted considerate, user-friendly settings automatically. However, until that day comes, these adjustments offer the most effective solution for now.
Смотрите также
- Как подключить клавиатуру и мышь к Steam Deck
- Сравнение камер Samsung Galaxy S25 Plus и OnePlus 13
- OnePlus 15 против Oppo Find X9 Pro: Флагманы в сравнении
- 20 лучших циферблатов Samsung Galaxy Watch, которые вам стоит использовать
- 6 лучших планшетов для путешествий в 2024 году
- XDC криптовалюта и прогнозы цен на XDC
- Инженер-пенсионер обнаружил ошибку 55-летней давности в коде компьютерной игры Lunar Lander
- Intel «отвратительно» отклонила некоторые возвраты дефектных процессоров, говорит YouTuber
- Huawei Watch GT 6 Pro против GT 5 Pro: Что нового в этом носимом устройстве?
- Я думал, что этот Android-телефон за 250 долларов станет катастрофой. Это не было
2025-02-19 19:04